|
 The spiral represented schematically.
|
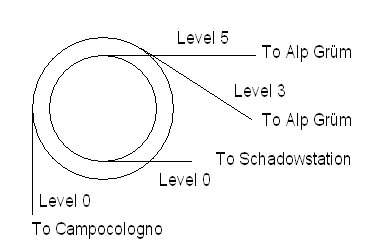
Module A houses a spiral tunnel that connects various parts of our layout but is also used
to overcome the large difference in height on a small surface. This spiral tunnel has two
parallel rail spirals. The inner spiral brings trains from the shadow-station to the
station of Alp Grüm or visa versa, This makes the largest difference in altitude. The
outer spiral runs from the station of Alp Grüm to the station of Campocologno or visa versa.
Both spirals are single track and used in both directions On the drawing on the left,
you can see how it is put together and also which level exits where. One thing is not
in the drawing; there is another passing station in the outer circle. Also the line
"to shadow-station" splits and the split-off goes underneath to the other side of
the station of Campocologno. The point where the two split is not only the way out of the
shadow-station but also the way in. This makes our layout into an 8 shape, just a little
bit twisted. One circle being the shadow-station and the other the rest of the layout.
|
|
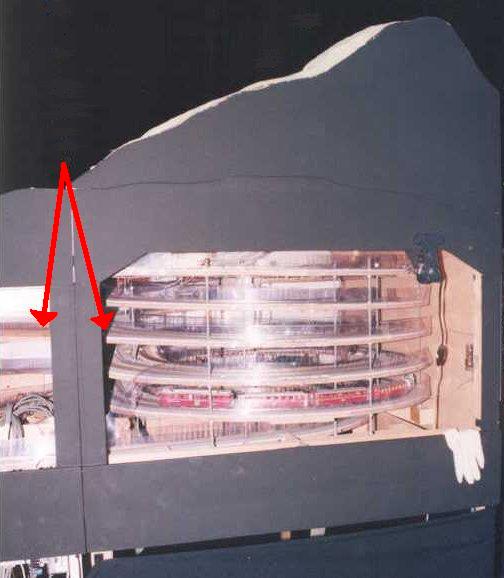 The red arrows in the picture point the place where the train
leaves the outer ring towards the station of Alp Grüm. They will
return to the spiral on the upper level but now on the inner
circle.
The red arrows in the picture point the place where the train
leaves the outer ring towards the station of Alp Grüm. They will
return to the spiral on the upper level but now on the inner
circle.
|
The picture shows the spiral tunnel, seen from the back. All
tracks in the tunnel are protected by plastic strips to prevent
trains from falling off. This plastic is flexible enough to be
able to put your hand between the levels of the spiral. Its
approximately 3 mm thick and is also used for isolating
doors in factories and trucks. The spiral is built of half
circles made out of 9 mm multiplex that are connected with
metal strips. We chose these strips because they are small and
thus need less height. They are placed beside the rails so they
also can't interfere with the pantographs. Connecting the parts
with wood would leave less room for the trains and thus increase
the gradient of the spiral. To make the gradient smooth and
adjustable we use threaded rods through all levels. One row (of 8 )
on the inside and one row on the outside of the spiral. Now you
can mount the wooden levels with a screw below and above, very accurately.
|
|
During construction of the spiral you have to mount the parts
(half circles) one by one over the threaded rods and put the
rails on them right away. If you don't put the rails on per half
circle you can't reach them anymore to fasten them. Its a lot
easier to do this part by part. Then adjust the gradient and
height per circle later on, when all parts are mounted.
|