Making wood transport wagons RhB type Rp-w and a camera wagon.

The beginning

Some time ago, Aart van Beek donated his materiel to region Middle Netherlands because he himself could no longer enjoy them. Part of this donation were 3 wagons for transporting wood. These wagons were home made by Aart and from very modest means. I have tested these wagons multiple times on our regional layout and on my own layout but they derailed regularly. Apart from that they did not match the Bemo model as they were slightly larger which made them bump into objects along the track once in a while.

In the whole page you can kick on the pictures to get an enlargement in a new window.

The old wagons

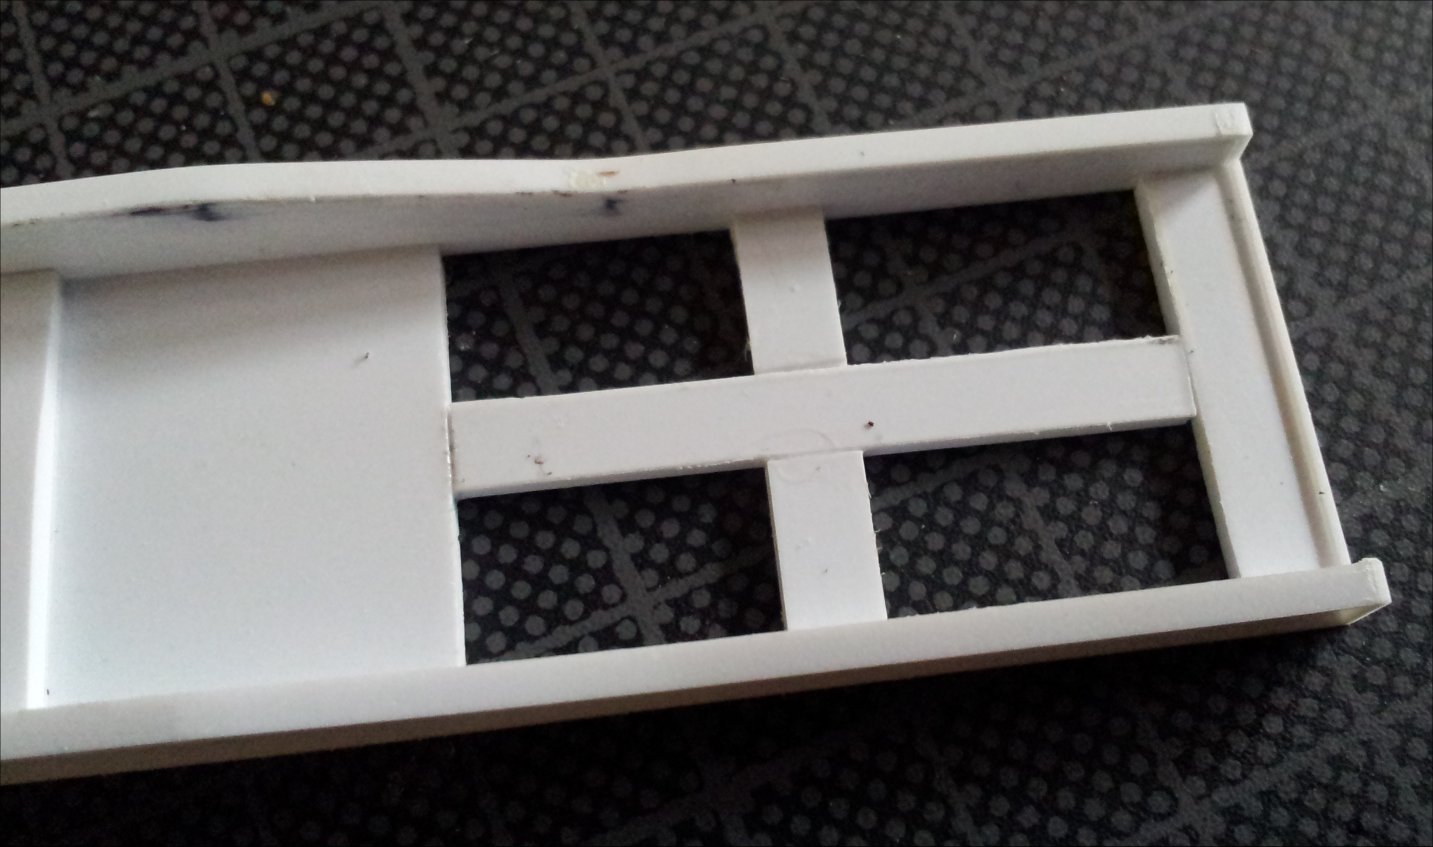
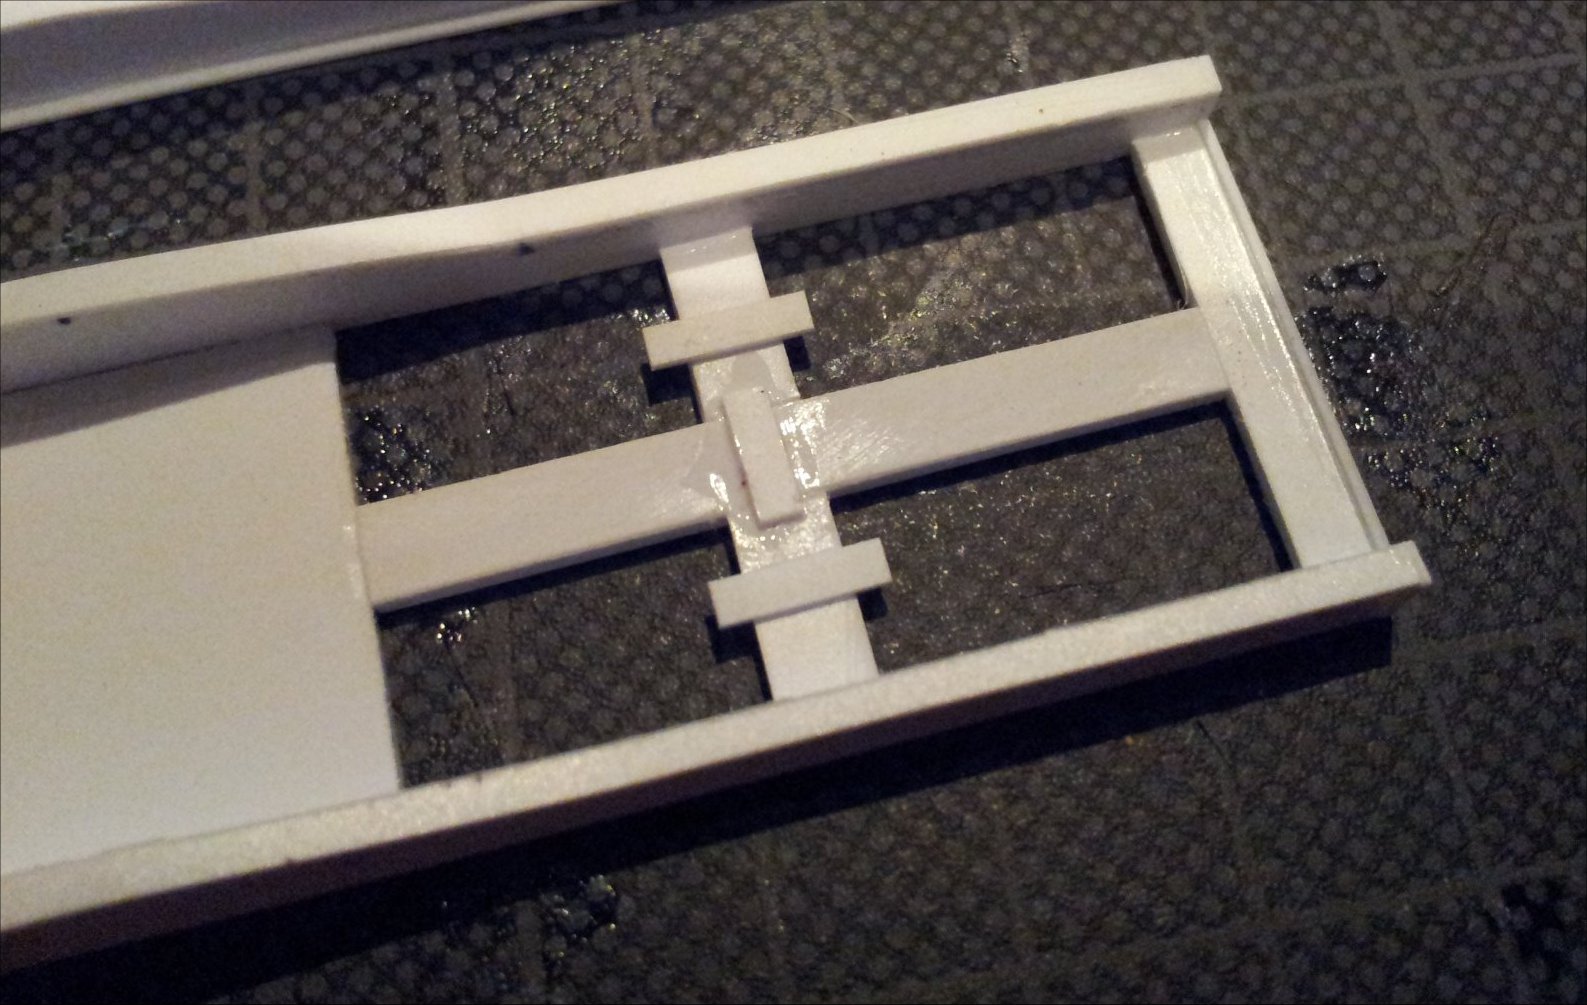
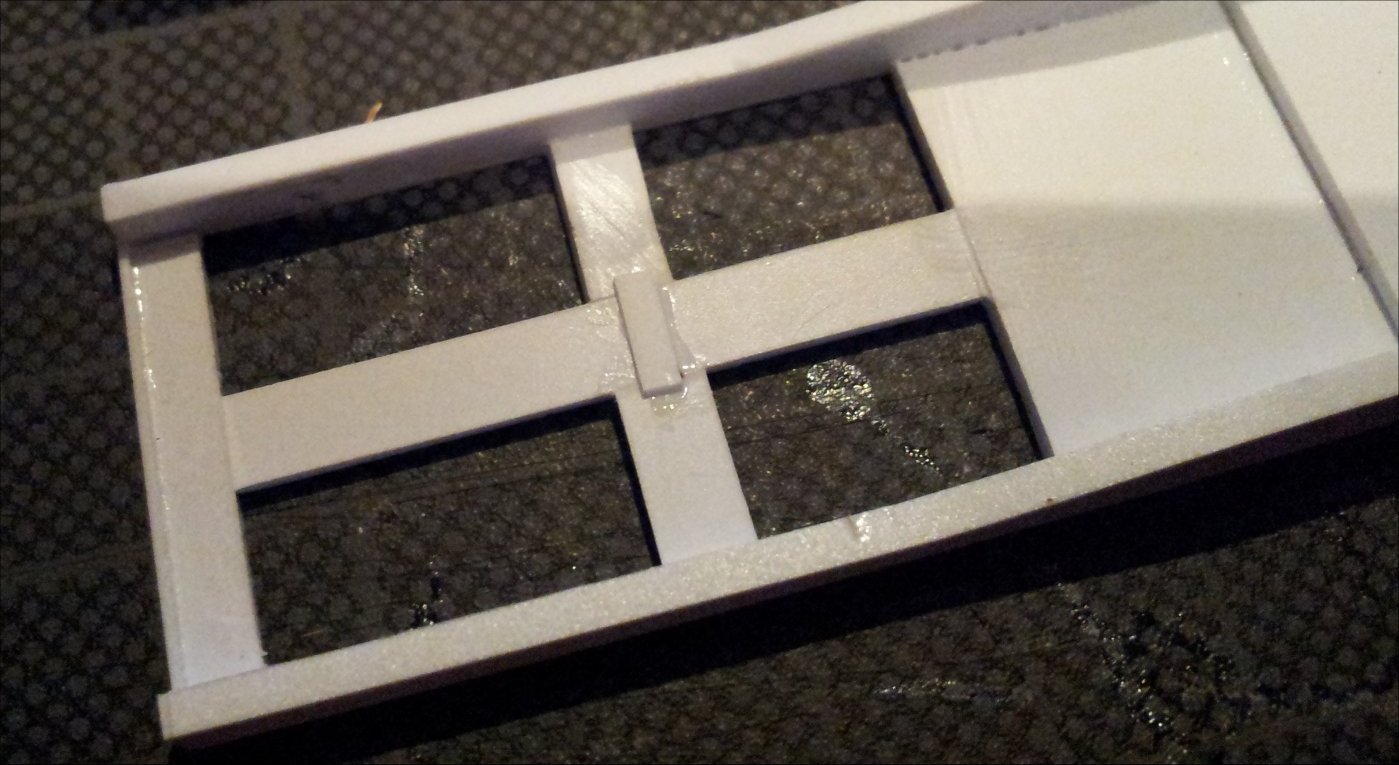
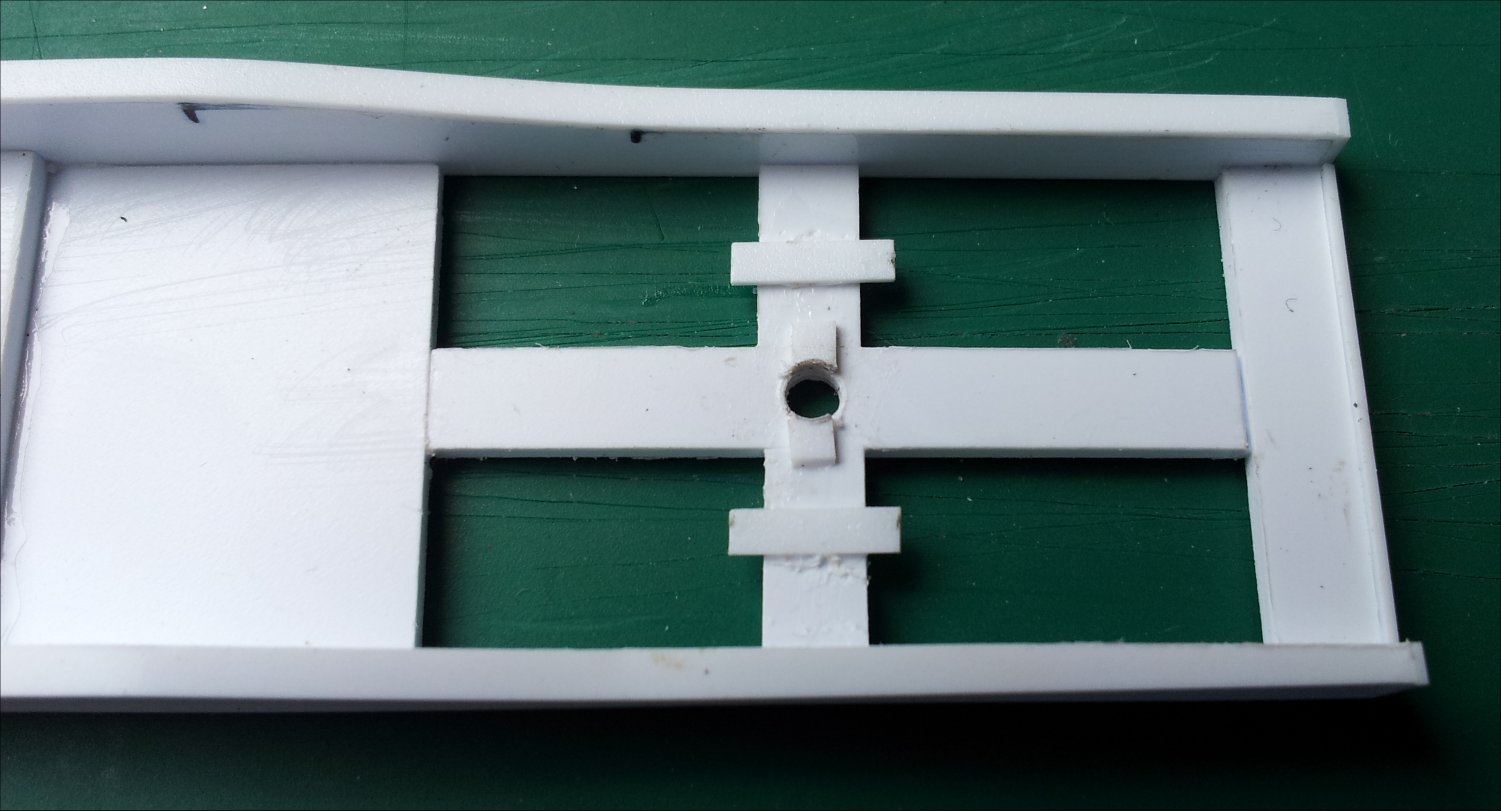
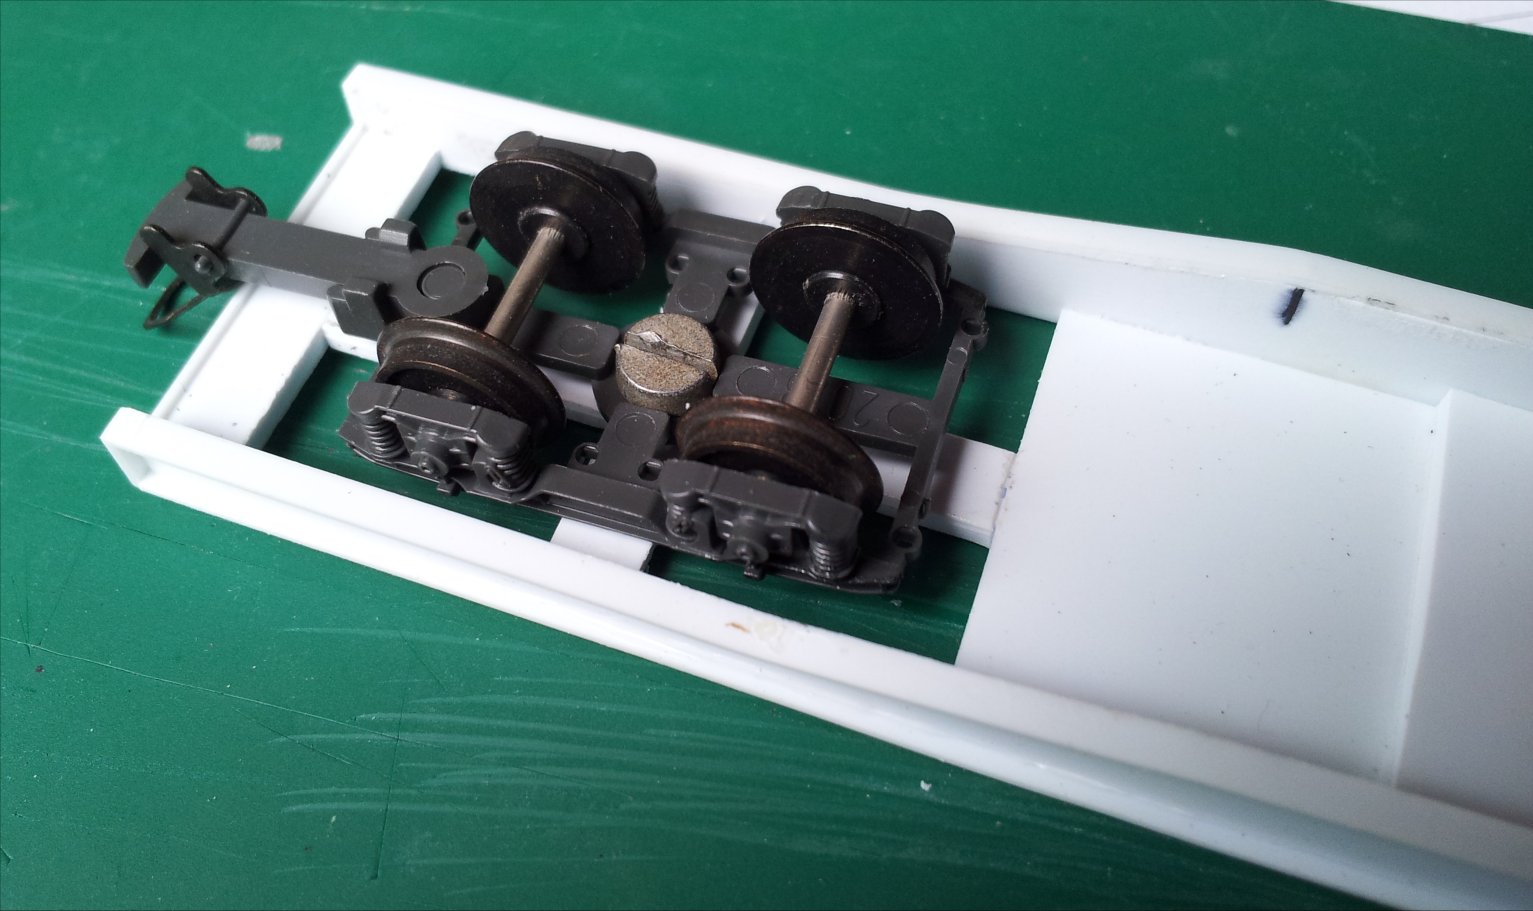
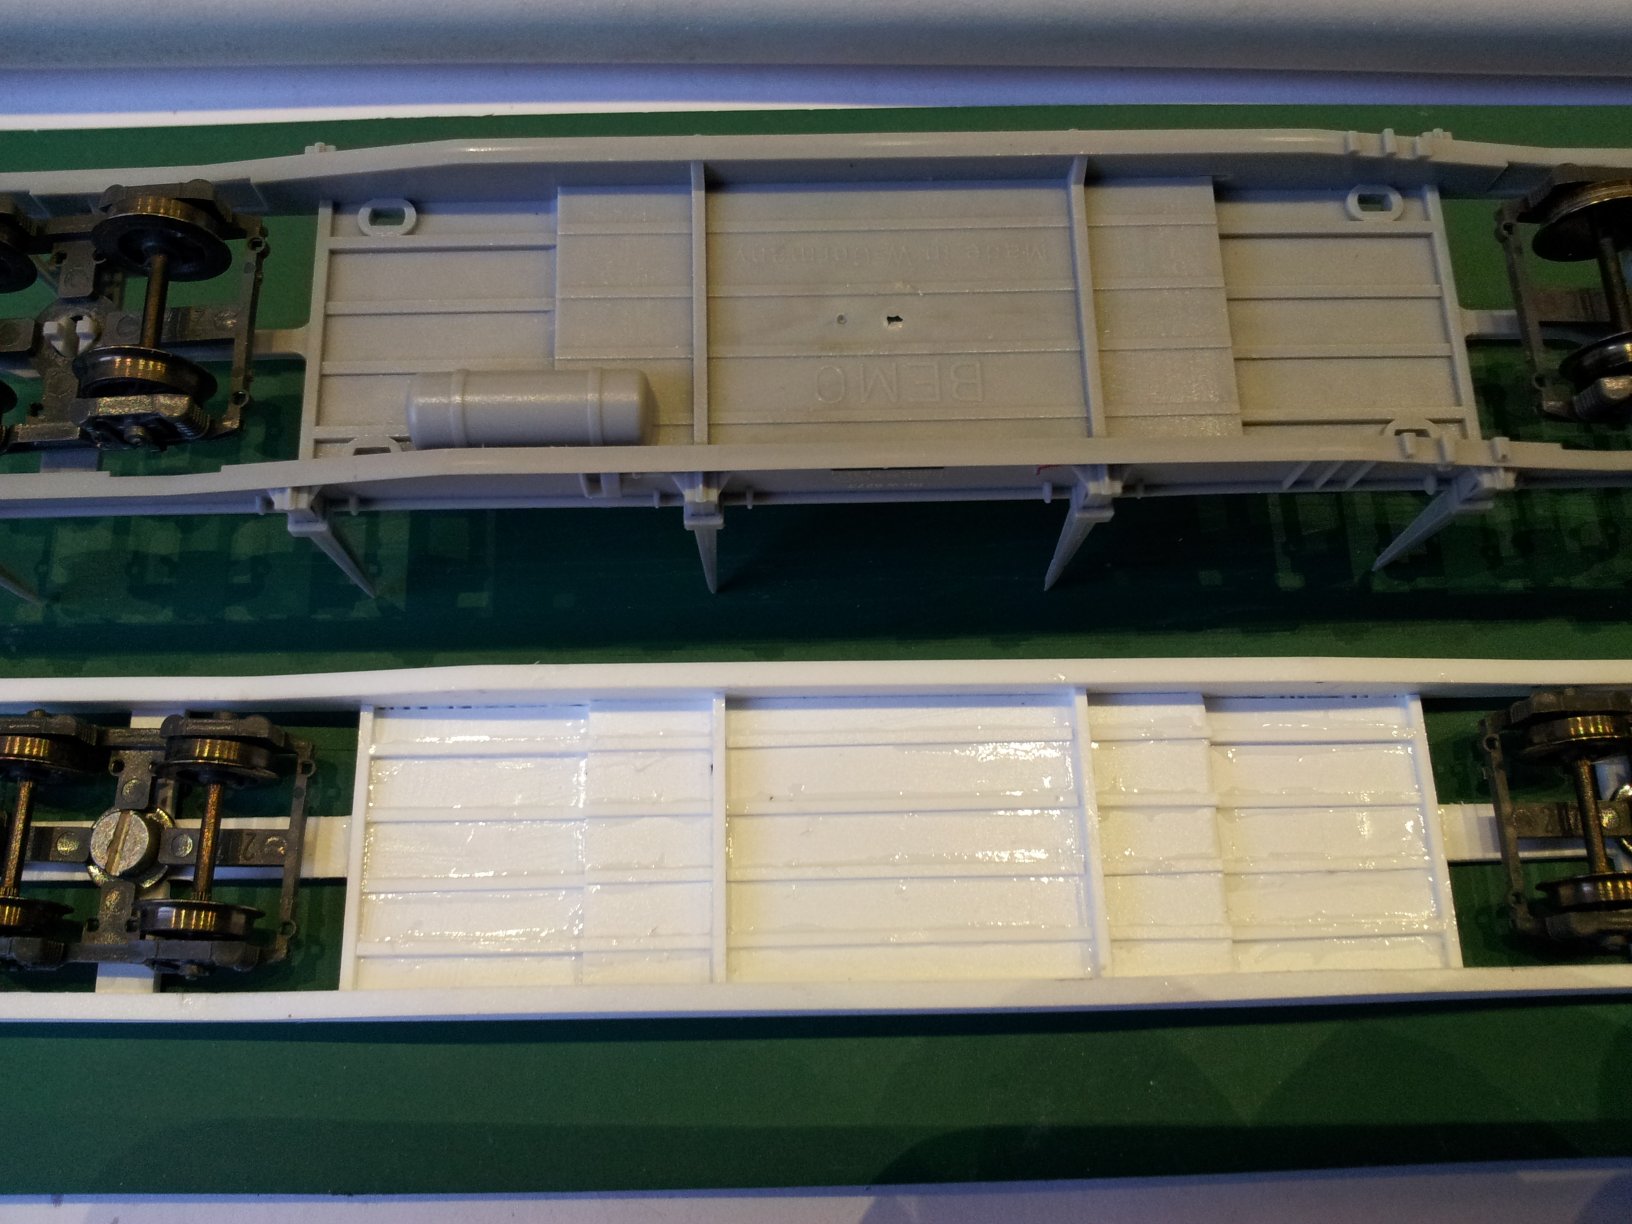
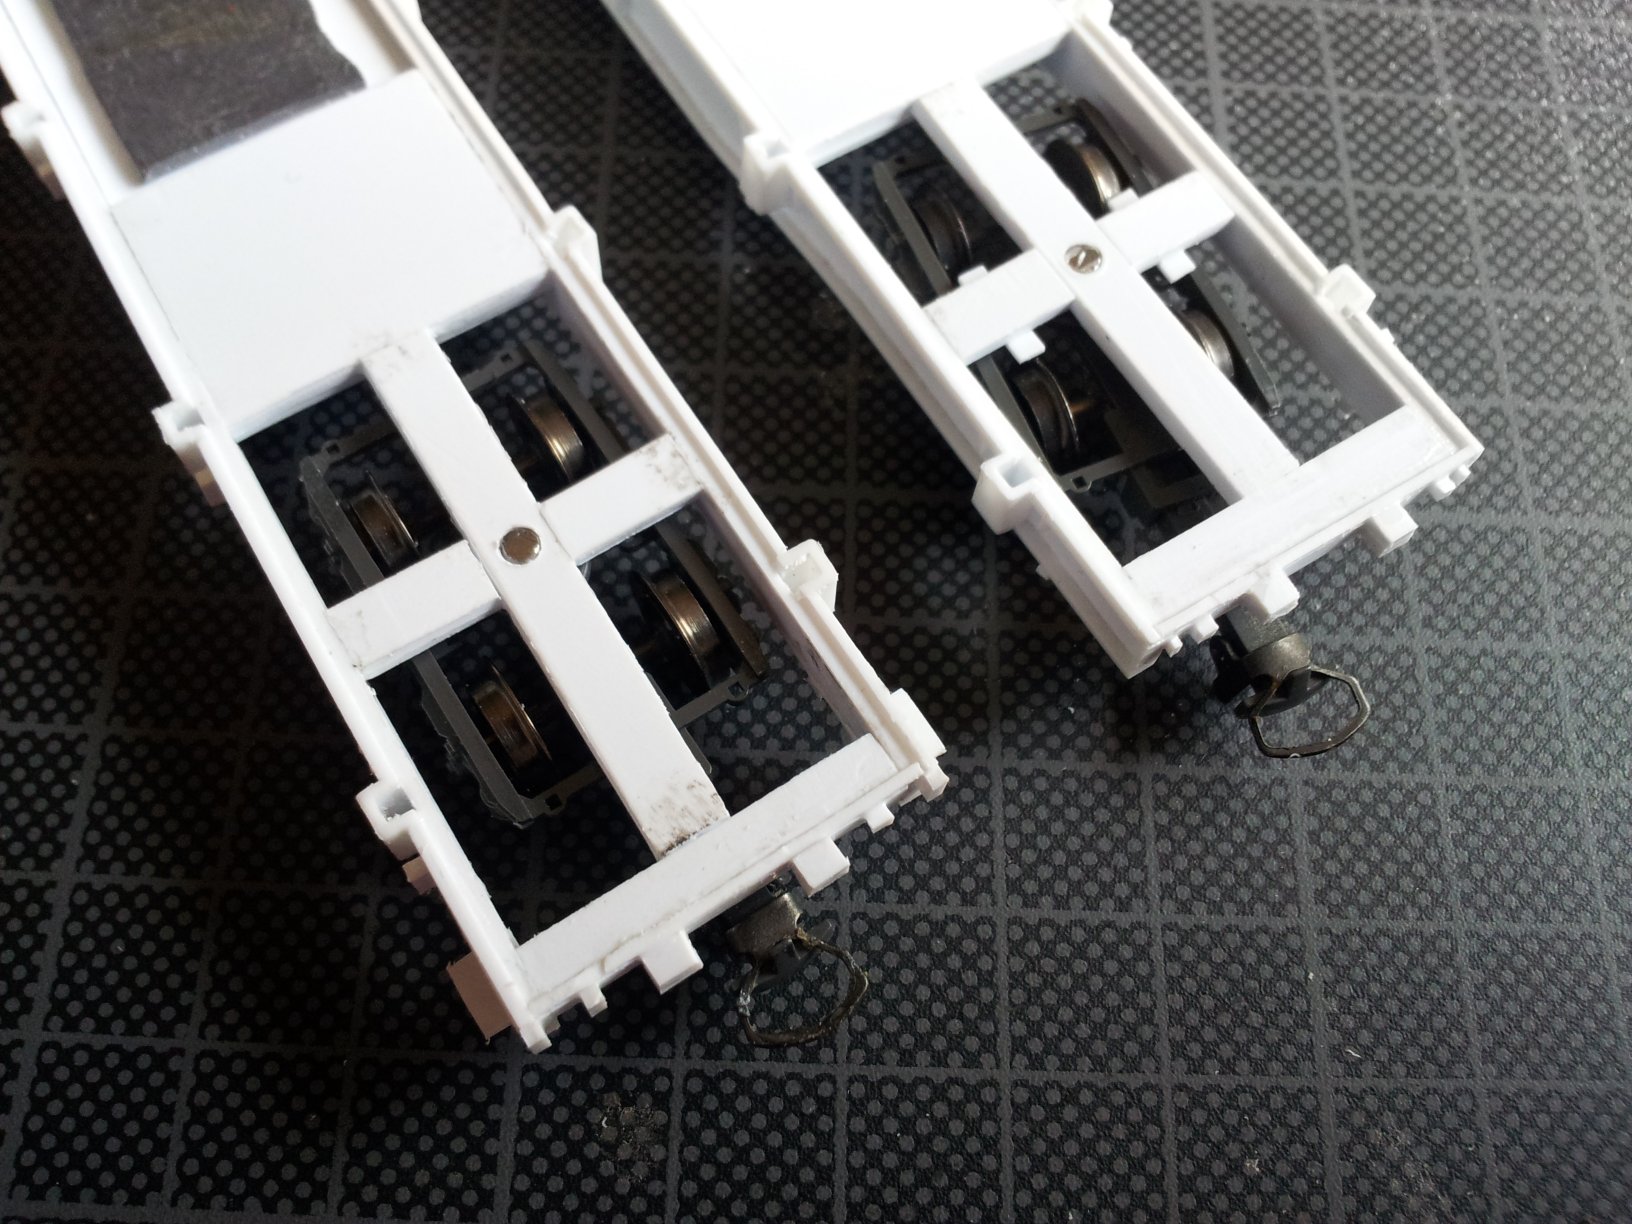
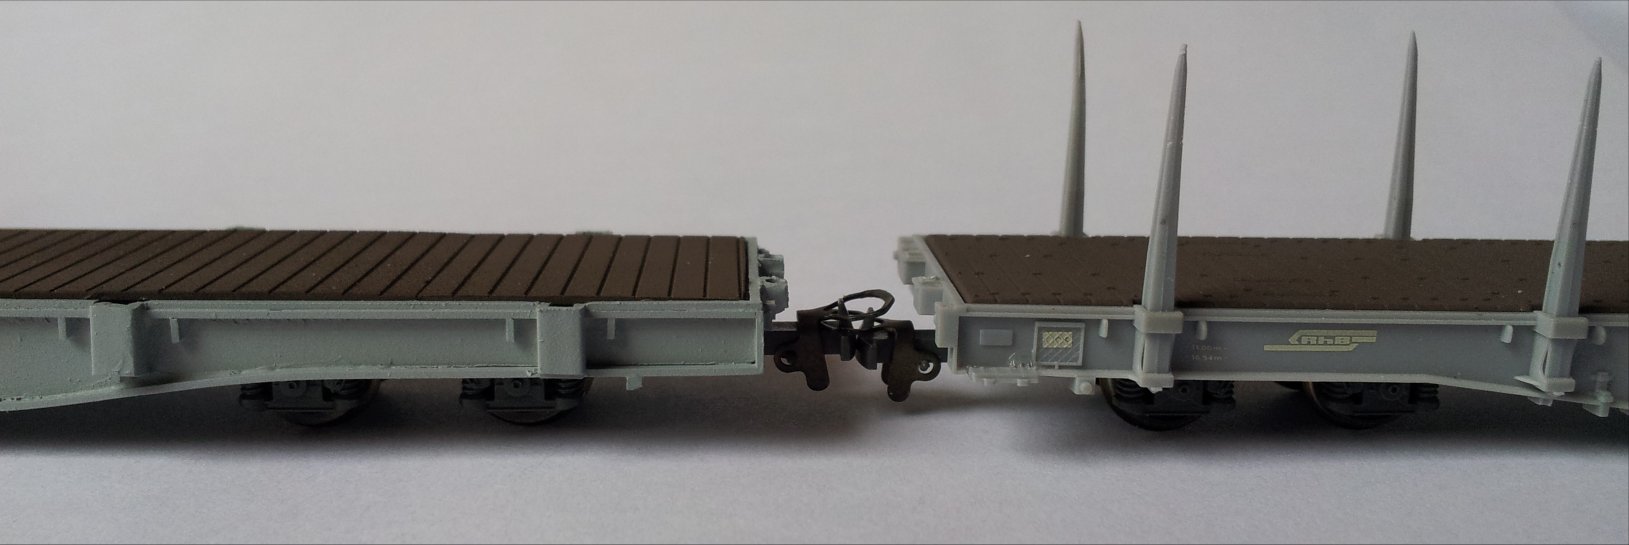
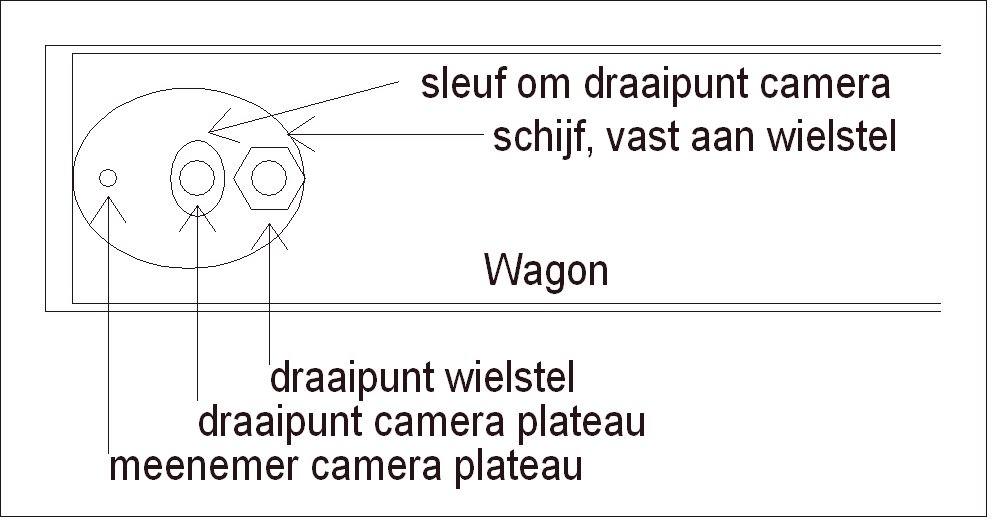
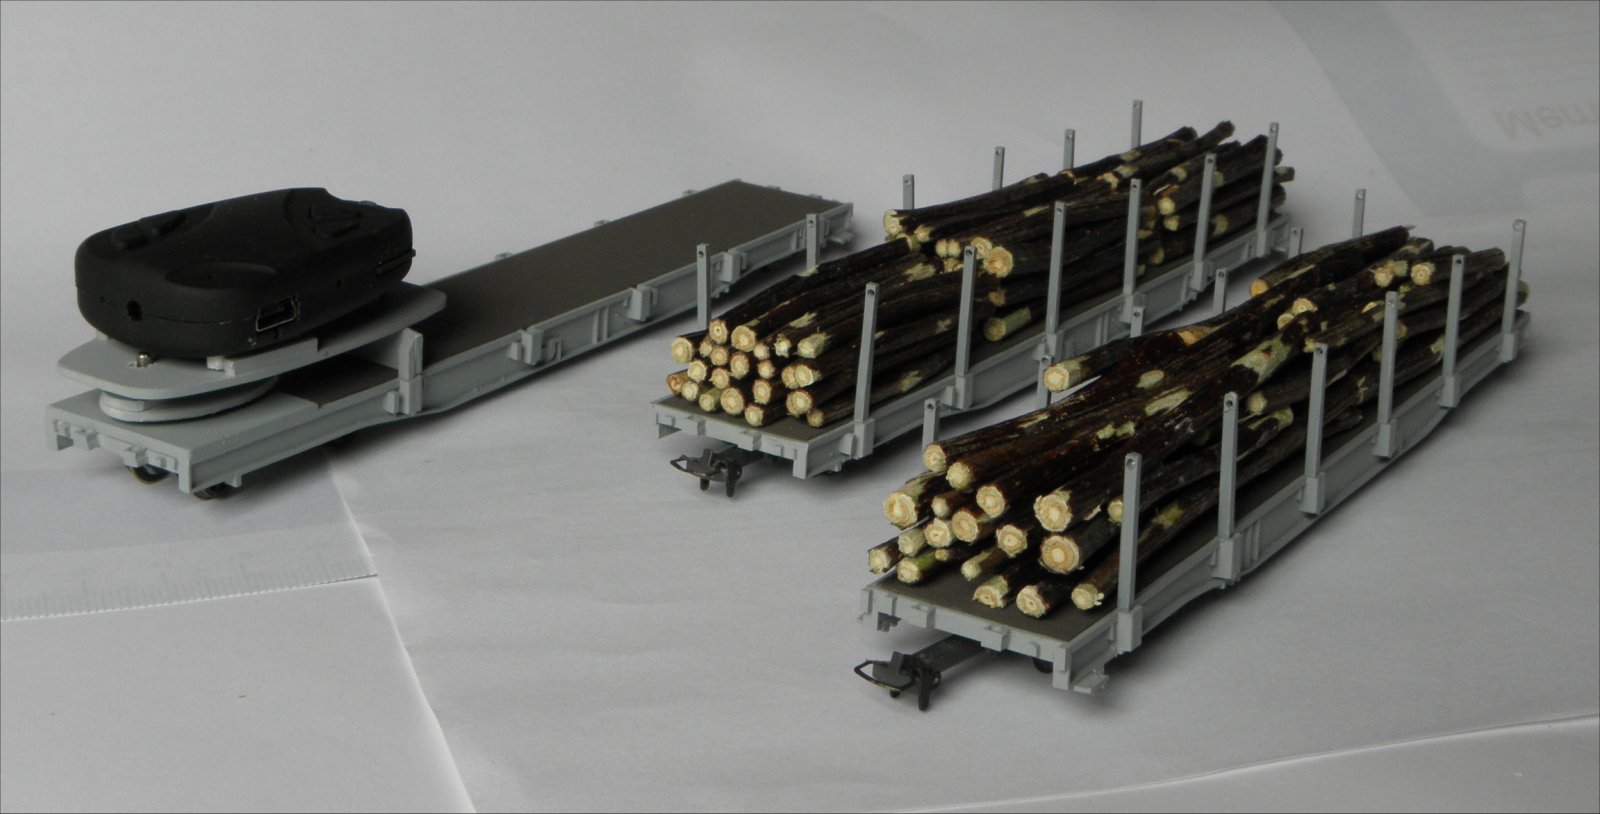
This was a petty as we were in need of some wagons for wood transport. To make this donation go though I decided to keep the bogies and use those to create 3 new wagons. During the planning the idea arose to make one of those cars fit to hold a camera. From multiple attempts to have a camera in front of a locomotive it turned out that the camera only shows what is outside a turn and does not show where you are going, it would be nice to have the camera turn farther then the bogies so that you can keep an eye on the rails. A wagon with bogies gives the option to transfer the movement of the bogies to the camera. With that principle I want to do some experimenting but now I'll guide you through the construction of the cars themselves.

The sides

Firs the construction of the wagons in steps. I started with styrene plates and strips of various sizes. The first parts are made of strips in size of 1 by 6,3 mm, Evergreen number 149. Out of these you can make the sides as show in the picture.

Now these sides have their shape you can add strength and shape by applying small strips on both sides. Here I used strips of 0,5 by 2 mm, Evergreen number 124.
The end of the sides needs to get another short strip of this size and then you are ready to start the bottom.

The bottom

From styrene plate of 1,5 mm thick, Evergreen number 9060, I cut strips of 24mm wide. out of these I cut 3 parts for the middle of the wagon which I glue together in such a way that there is still room for some extra weight.

Now these parts can be glued to the sides and it already starts to look like a car.
2 upper views and 1 bottom view.

The mounting point for the bogies

As son as the glue has hardened properly you can start with the parts that will hold the bogies. For this I used again styrene plate of 1,5 mm thick. That is 0,5 mm thicker than the wagon from Bemo but I'll win that back at the top. I'll first put a strip on each end of the wagon that I'll cover again with a strip of 0,5 by 2 mm. Than a strip of 5mm wide in the longitudinal direction. Then rectangular to that 2 strips of 5mm wide.

The balance

Now the last phase before you can attach the bogies, the bogies should not only be able to turn but also be able to absorb sideways swinging. To allow this I attach small strips of styrene, 0.5 by 2 mm under the wagon. On one side only in the middle so that this bogie can swing sideways, on the other side also 2 more to the sides, They should match the position of little dots on the bogie so that this bogie can only swing in forward direction. This way the wagon can smooth out irregularities in the rail.

The turning point

If the glue has hardened, it's time for the turning point. I drilled a hole of 2,5 mm in the middle of the 2mm strip. Than I tap M3 (3mm) screw-thread in there. This allows you to fasten the bogie with a 3mm bolt.
Now it's time to take a look at the weight of the wagons. The Bemo wagon weighs, including metal plate, 20 gram, my version reaches 15 gram. In my opinion the Bemo wagon was too light so I decided to put 10 gram of lead in it so that I would reach 25 gram.
Then it's time for testing, relief, they behave perfectly on my layout at home. Also when pushed by the locomotive.

The underside

Than I continue the construction with the bottom. This is a place that is of no interest for some and for others it is a must to have that perfect as well. I really only look at the bottom if I want to know who is the owner after using it on a show. But as the wagon is not for myself but for the club I do add some details to it. The bottom has has a few transversal bars of about 1 mm wide and a few bars longitudinal. I use for the transversal bars Evergreen number 144, 1 by 2 mm and for the longitudinal bars Evergreen number 122, 0,5 by 1 mm. Some bars are a bit thicker, then I glue 2 strips on each other. On the picture next to here the result. The tank I've left out to keep it simple.

Details

Continuing with the details.
On the sides you have all kind of bars, fittings and so on. I'm trying to mimic these as good as possible to match the Bemo wagon. For the fittings of the vertical stabs I've chosen square pipe of 3,2 mm. If I glue a complete square to the side, the wagon becomes too wide so I cut one side off, keeping a U-shape. Now the size matches. To determine the location for these fittings, I take the bottom plate of the Bemo wagon and mark the places that have holes in the sides. I remove small parts of the sides at those places and glue that U-parts in there.

Details

On the front en back ends of the wagon a hold few smaller fittings. For this I used 2mm strips and glue 2 on top of each other to make a cube. That I glue to the front and back of the wagon and after drying I drill a hole in it of 1,5 mm. Next to that a few more small squares have place on the sides. At the sides there are various bars and valves. Also the clamps to connect the strings that hold the wood in place and a step on each end. From the side it looks like this.

Paint

Now the wagon needs a paintbrush. I took the Bemo wagon to a shop but couldn't find aan exact matching color but something that came close. For the wooden floor (Evergreen plate number 2100) I've used color 98 from Humbrol. That is a little bit more grey then the Bemo but it looks more like a used car. I've taken the opportunity to make the Bemo wagon match that color, That also removes the shining plastic look. For the sides I've chosen the color satin 127 from Humbrol, that matches the Bemo wagon very close.
See the result, left side is the own made, right the Bemo wagon.

Adjustments

When test driving on the club layout all cars derailed in one turn and ran fine on the rest of the track. It looked like the bogies couldn't turn far enough, so another comparison with the Bemo wagon was needed. And yes, a seemingly small difference in the sides of the car. Bemo has small notches next to the bogies and mine doesn't. so, I cut out a small notch of a half millimeter. You can, of course, also make the car a millimeter wider, no-one will notice.
And solved, they can now do all turns.

Rongen

Than they still need supports for the load.
If I search the internet for pictures of these wagons I find various types of them all under the same name. H-profile, square bars with a hole on top, square straight or even rotatable. I've tried to make them from H-profile but hat would require me to buy a few more bags of strips so I took a square strip of 1,5 by 1,5 mm. On an sandpaper I made them a bit taper. Now a small hole in the top and you have it matching the photo's from the internet.

Camera wagon

With the wagon that I wanted to equip with a camera, I did it a little different because I wished to use the turn of the bogie for the camera. Here I drilled a hole of 4 mm in the wagon and in the bogie I made 4 mm screw-thread, so that a bolt can be screwed and glued in the bogie.

Camera wagon theory

Because I want that the rotation of the bogie is passed on the the camera, I had to change the setup of the car on one side. It must also have a platform that turns with the bogie or, preferably a bit more.

First the theory.
I've written above that I mounted a bolt to the bogie that stretches through the wagon. On there I screw 2 nuts with an oval disk in bewteen. This disk turns with the bogie.

Transmission

Because the rotation is insufficient, it has to be amplified. I attach a small pipe shortly before the center of the bogie, this is to be the center of rotation for the camera. Further to the front, in the oval disk I make a pin that has to plug into the camera plateau. Because the pin is further away from the center of rotation then the pipe, the camera will turn further than the bogie. The closer the pin comes to the pipe, the more the rotation will be amplified. This brings a risk that the camera may not turn smoothly enough so I start with the pin far to the front.
The oval disk that amplifies the rotation of the bogie to the camera.

The camera plateau

The camera plateau from below, the bolt fits into the pipe and serves as turning point, the hole is for the pin. This hole in a little oval because the pin needs to move a bit and also to accommodate movements of the bogie.

The camera plateau

The plateau mounted, the bolt that raises from the plateau is for mounting the camera. The strips are to stabilize the camera.

From the side

The plateau from aside. Below the back I created a small support the prevent excessive movements of the camera while driving. The top of the support has a point to reduce friction.

Test, test, test, does it really work?

Yes and no is the first conclusion, here a few points.

  1. As a whole it runs smooth enough so the car does not derail in the turns, that is promising.

  2. The camera does not turn properly back to the middle after a turn.

  3. I also would like it to turn a bit more to better see where you are going.

So, I'm not there yet. Let met start with point. There is almost no clearance between the boogie and the platform, so that leaves that the bogie does not quite turn straight after a turn. That can have 2 reasons, the wheels could be too close together on the axel or the axels are too close together in the bogie. This could also influence point 3.
Lets first try to move the wheels somewhat further apart because I can easily turn the bogie 20 degrees without lifting the wagon. So I widened the wheels from 11,7 to 12 mm. That helps a bit but not enough. There is still to much movement in the bogie, The axles can move left and right in the bogie. Also the camera moves a bit jerky. I can't deny a bit of frustration, how much time would it cost to make a new bogie and not use the Bemo one?

New bogie

If I move the axles further apart, I have no space to use bearings on the outside because they would hit the frame. The axel distance is now 16 mm, comparing a motor wagon type 40, it is 26 mm. A gamble, let me try that 26 mm. This just fits in the frame of this wagon, larger would not go. First result after filming is that the camera now returns nicely to the middle after a turn. Point 2 solved. See here the new bogie after about an hour of work.

Testing at the club layout

I'll leave Point 3 for now, that could be an issue with my own layout. Lets first test on the club layout.
A round at the club…. Well that is disappointing, the fist point already forms a problem, the other points too. What a bad points, those Bemo ones, compared to my Peco points. So the wheels need to be put a bit closer together and that improves a lot. The wagon needs more weight to stay in the rails properly. I've removed a few ridges on the bottom and glued a few peaces of lead underneath. That worked nicely.
Remains point 3, I would like the camera to turn a bit further in the turns. But first a few more tests to prove the function. Eurospoor is a good moment for that because we cannot put up our complete layout in our clubroom.

Light?

Now I'm on it anyway, what would I like to be added... I think of shooting at night or being able to see anything in the tunnel. That beyond the capacity of my camera, it needs mobile light. I could equip the wagon with LEDs to light the path. As if you would have headlights of the locomotive that enable your shots. They would have to turn with the camera so they need to be mounted below the plateau the holds the camera. Power supply? That can be done from the rail or through a few batteries or a combination.

Conclusion

A nice project and it wasn't too hard for someone that never built a wagon. let me put it as 80% inspiration and 20% transpiration. Aart, Thank you very much for giving me the inspiration because without your donation I would probably never have taken this hurdle.
Qua material I have spent about €55,- for 3 wagons (apart from the bogies, because they came from the donation) and I have still some stuff fleft. I think that I can still make another 3 wagons with what I have left over.

Hans Hosang